After the sail, I added some hardware to the spars, namely jackstays. I also ordered some aircraft plywood and used it to make new winch drums. These are sized to my current plan of only bracing the tops'l yards. Hopefully, this is the last set I'll have to make.
Seeing into the dark interior of the hull can be a pain, more so the brighter it is outside. Mark got some red LEDs to light up the dash of his old pick-up (ute for my Assie friends) and gave me a left-over section. it requires a 12 volt supply (I'm running 6) and red doesn't really help in daylight, but I like the idea. if I can find a white LED strip that'll run on 6 volts, this will definitely get put in.
The stern also had folding bulwarks like the bow, but that wrapped all the way around. On the real ship these were replace with a fixed bulwark except for a couple of panels that allowed access to the stern boat. By the time the ship came to Baltimore in 1955, these too were gone, with all their hardware.
Again, I'm not making them functional, and decided to built these on the model rather than as separate pieces like on the bow. The hinges are represented inboard by card stock and brass eyes. The barrel portion of the hinges outboard at the bottom of each panel will be a little section of 1/16" wood dowel.
The forward bulwarks were epoxied in place and the support rods were installed all around. The tops are raw because they all get a bright cap rail (varnished natural wood) and I'll put that on when it won't get messed up with paint or glue.
A friend sent me a box of stuff, among which was a nive little cat face perfect for my catheads. Only having one, I was going to cast a pair in resin. But I'm out of casting resin and epoxy glue didn't set up in a way I liked, so we'll come back to that.
The tops'l yards on the ship are hinged iron bands, line with wood staves. I wanted to replicate that functionality not only because that's what the ship has, but because it would allow me to take them off the mast without unrigging half the ship.
I cut some heavy copper I use for everything and bent it into two half circles; soldiered brass tubing to the ends, and sawed out the notches with a jewelers saw. if only it had been that easy. Soldiering here tended to un-soldier there, cold soldier joints wouldn't hold. I gave up in frustration.
I changed the gun carriages based on some research I did, but I'll post separate entries dealing with them and the ship's boats.
I went looking for information on soldiering little things, and took another whack at the parrels. This time it worked out much better. I reused the copper band and brass tubing for the main and made the fore the same way. I still have to make the mizzen tops'l yard parrel, but my soldiering has gotten much much better.
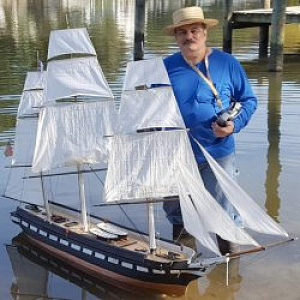
Last May ('17) I took the boat to the Baltimore Port Expo for National Maritime Day again, surrounded by members of our newly formed White Rocks Model Boat Club. I didn't manage to get her controls set-up in time, so she didn't go in the pool, but sat on her cart and looked pretty. I put her courses and trys'ls on her for this. The trys'ls won't be used when she sails, but can be set for static displays. The courses will get used, but I'll be able to buntl them up as shown to reduce sail. Also to reduce sail, the t'gallants and royals will be easily removable, or replaceable, as the case may be, depending on what wind there is.
That pretty much brings us up to date as of July 2017. I'll post something about the boats and guns in a bit, as well as any other progress that's made.
There's far more detail, images, and notes at my website on this, and the other models I'm working on at:
http://todd.mainecav.org/model/
There's a few items I skimmed, or skipped over, like her signal flags, that are covered in detail there; like the day she was almost dismasted by the garage door.