

In 1856, Constellation had two 10 shell guns mounted bow and stern as "pivots" or shifting guns. To make shifting them easier, and prevent them tearing up the deck, sectional iron plates were screwed down to the deck, a bit like model rail-road track, these were referred to as "circles" or "gun circles."
What pattern was actually used on Constellation is so far unknown. The museum folks think there was just a basic circle under each gun, but I think they've interpreted the name a little too literally, as I can find very few examples where just a single simple circle was used.
I decided to base the model on the more complicated patterns I found in photos and a diagram in the Navy's 1852 manual: Preparation of Vessels of War for Battle.
I cut the circles from 1/32" (.5mm) sheet styrene, painted black, and glued to the deck with gel CA.
Both guns on the model sit on access hatches that don't correspond to any actual hatch, so the bow circles, especially, had to accommodate the seam of the hatch.
[{"id":"155594200654","name":"155594200654.jpg","caption":"","url":"https:\/\/hobby.land\/media\/155594200654\/l","thumbUrl":"https:\/\/hobby.land\/media\/155594200654\/s","isImage":true,"ext":"jpg"},{"id":"155594202674","name":"155594202674.jpg","caption":"","url":"https:\/\/hobby.land\/media\/155594202674\/l","thumbUrl":"https:\/\/hobby.land\/media\/155594202674\/s","isImage":true,"ext":"jpg"},{"id":"155594202713","name":"155594202713.jpg","caption":"","url":"https:\/\/hobby.land\/media\/155594202713\/l","thumbUrl":"https:\/\/hobby.land\/media\/155594202713\/s","isImage":true,"ext":"jpg"},{"id":"155594202846","name":"155594202846.jpg","caption":"","url":"https:\/\/hobby.land\/media\/155594202846\/l","thumbUrl":"https:\/\/hobby.land\/media\/155594202846\/s","isImage":true,"ext":"jpg"},{"id":"155594202842","name":"155594202842.jpg","caption":"","url":"https:\/\/hobby.land\/media\/155594202842\/l","thumbUrl":"https:\/\/hobby.land\/media\/155594202842\/s","isImage":true,"ext":"jpg"},{"id":"155594203055","name":"155594203055.jpg","caption":"","url":"https:\/\/hobby.land\/media\/155594203055\/l","thumbUrl":"https:\/\/hobby.land\/media\/155594203055\/s","isImage":true,"ext":"jpg"}]
In 1856, Constellation had two 10 shell guns mounted bow and stern as "pivots" or shifting guns. To make shifting them easier, and prevent them tearing up the deck, sectional iron plates were screwed down to the deck, a bit like model rail-road track, these were referred to as "circles" or "gun circles."
What pattern was actually used on Constellation is so far unknown. The museum folks think there was just a basic circle under each gun, but I think they've interpreted the name a little too literally, as I can find very few examples where just a single simple circle was used.
I decided to base the model on the more complicated patterns I found in photos and a diagram in the Navy's 1852 manual: Preparation of Vessels of War for Battle.
I cut the circles from 1/32" (.5mm) sheet styrene, painted black, and glued to the deck with gel CA.
Both guns on the model sit on access hatches that don't correspond to any actual hatch, so the bow circles, especially, had to accommodate the seam of the hatch.
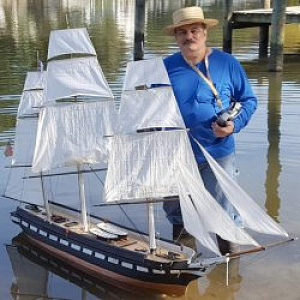
Rented a UHaul trailer to transport the models the Chesapeake Bay Maritime Museum.
Managed to get Constellation into the Miles River, but only in shifty winds between two piers full of boats.
[{"id":"155871255762","name":"155871255762.jpg","caption":"","url":"https:\/\/hobby.land\/media\/155871255762\/l","thumbUrl":"https:\/\/hobby.land\/media\/155871255762\/s","isImage":true,"ext":"jpg"},{"id":"156743443086","name":"156743443086.jpg","caption":"","url":"https:\/\/hobby.land\/media\/156743443086\/l","thumbUrl":"https:\/\/hobby.land\/media\/156743443086\/s","isImage":true,"ext":"jpg"},{"id":"156743443113","name":"156743443113.jpg","caption":"","url":"https:\/\/hobby.land\/media\/156743443113\/l","thumbUrl":"https:\/\/hobby.land\/media\/156743443113\/s","isImage":true,"ext":"jpg"},{"id":"156743443112","name":"156743443112.jpg","caption":"","url":"https:\/\/hobby.land\/media\/156743443112\/l","thumbUrl":"https:\/\/hobby.land\/media\/156743443112\/s","isImage":true,"ext":"jpg"},{"id":"156743443335","name":"156743443335.jpg","caption":"","url":"https:\/\/hobby.land\/media\/156743443335\/l","thumbUrl":"https:\/\/hobby.land\/media\/156743443335\/s","isImage":true,"ext":"jpg"},{"id":"156743443348","name":"156743443348.jpg","caption":"","url":"https:\/\/hobby.land\/media\/156743443348\/l","thumbUrl":"https:\/\/hobby.land\/media\/156743443348\/s","isImage":true,"ext":"jpg"},{"id":"156743443556","name":"156743443556.jpg","caption":"","url":"https:\/\/hobby.land\/media\/156743443556\/l","thumbUrl":"https:\/\/hobby.land\/media\/156743443556\/s","isImage":true,"ext":"jpg"},{"id":"155871257992","name":"155871257992.jpg","caption":"","url":"https:\/\/hobby.land\/media\/155871257992\/l","thumbUrl":"https:\/\/hobby.land\/media\/155871257992\/s","isImage":true,"ext":"jpg"}]
Having a regular job again means two things; not having time to work on my models, and being able to afford a 3D printer.
Because of this job, nothing's been done to the models since Constellation went sailing in May 19, but last March, I got an Elegoo Mars resin printer and proceeded to pop out some carronades and 18 pounder barrels for Macedonian, mainly because I had files for those.
To do anything more I needed to find or create 3D models of what I needed. Finding files was a long-shot at best, so it's come down to chipping off the rust and building some digital models myself.
My first shot was at Constellation's head carvings, but that was too bold a step, it being quite some time since I seriously built a 3D model. I put this one on hold and moved to something much simpler, a turned post that supports the pin-rails at the base of the fore and main masts. This came out pretty well and I even got 15 of them to print well on the first try.
Emboldened by this success, I picked the launch's boat howitzer to try next. It was a bit tedious, and while I found lots of material and images on what these guns looked like, it seems every one was at least a little different than the others.
A test print didn't come out very well, but it did help me figure out some errors and flaws in the digital model.
Before trying to print anything in earnest, I figured to make a few 3D models, next up being the pivot guns.
I had already made the pivot guns from wood and resin, and intended on detailing them out with photo-etched hardware and fittings. Instead, I going for the entire gun, carriage, and slide as a fully detailed model, and hopefully print it in a single piece, well, print TWO of them that is.
The most basic of 3D models for this pivot gun was made years ago, so all I had to do was detail it out. I'm real happy with how the 3D model turned out, though I'm real nervous about actually printing the things.
This forum doesn't offer a way to put images into the text, or display them in any sort of order, so you'll have to figure out what pic goes where and with what on your own - sorry.
[{"id":"159487951224","name":"159487951224.jpg","caption":"","url":"https:\/\/hobby.land\/media\/159487951224\/l","thumbUrl":"https:\/\/hobby.land\/media\/159487951224\/s","isImage":true,"ext":"jpg"},{"id":"159487899483","name":"159487899483.jpg","caption":"","url":"https:\/\/hobby.land\/media\/159487899483\/l","thumbUrl":"https:\/\/hobby.land\/media\/159487899483\/s","isImage":true,"ext":"jpg"},{"id":"159487880210","name":"159487880210.jpg","caption":"","url":"https:\/\/hobby.land\/media\/159487880210\/l","thumbUrl":"https:\/\/hobby.land\/media\/159487880210\/s","isImage":true,"ext":"jpg"},{"id":"159488007053","name":"159488007053.jpg","caption":"","url":"https:\/\/hobby.land\/media\/159488007053\/l","thumbUrl":"https:\/\/hobby.land\/media\/159488007053\/s","isImage":true,"ext":"jpg"},{"id":"159487839966","name":"159487839966.jpg","caption":"","url":"https:\/\/hobby.land\/media\/159487839966\/l","thumbUrl":"https:\/\/hobby.land\/media\/159487839966\/s","isImage":true,"ext":"jpg"},{"id":"159487840210","name":"159487840210.jpg","caption":"","url":"https:\/\/hobby.land\/media\/159487840210\/l","thumbUrl":"https:\/\/hobby.land\/media\/159487840210\/s","isImage":true,"ext":"jpg"},{"id":"1499400828","name":"1499400828.jpg","caption":"","url":"https:\/\/hobby.land\/media\/1499400828\/l","thumbUrl":"https:\/\/hobby.land\/media\/1499400828\/s","isImage":true,"ext":"jpg"},{"id":"159487872893","name":"159487872893.jpg","caption":"","url":"https:\/\/hobby.land\/media\/159487872893\/l","thumbUrl":"https:\/\/hobby.land\/media\/159487872893\/s","isImage":true,"ext":"jpg"},{"id":"159488033738","name":"159488033738.jpg","caption":"","url":"https:\/\/hobby.land\/media\/159488033738\/l","thumbUrl":"https:\/\/hobby.land\/media\/159488033738\/s","isImage":true,"ext":"jpg"},{"id":"159488068945","name":"159488068945.jpg","caption":"","url":"https:\/\/hobby.land\/media\/159488068945\/l","thumbUrl":"https:\/\/hobby.land\/media\/159488068945\/s","isImage":true,"ext":"jpg"},{"id":"159488069143","name":"159488069143.jpg","caption":"","url":"https:\/\/hobby.land\/media\/159488069143\/l","thumbUrl":"https:\/\/hobby.land\/media\/159488069143\/s","isImage":true,"ext":"jpg"}]
Having a regular job again means two things; not having time to work on my models, and being able to afford a 3D printer.
Because of this job, nothing's been done to the models since Constellation went sailing in May 19, but last March, I got an Elegoo Mars resin printer and proceeded to pop out some carronades and 18 pounder barrels for Macedonian, mainly because I had files for those.
To do anything more I needed to find or create 3D models of what I needed. Finding files was a long-shot at best, so it's come down to chipping off the rust and building some digital models myself.
My first shot was at Constellation's head carvings, but that was too bold a step, it being quite some time since I seriously built a 3D model. I put this one on hold and moved to something much simpler, a turned post that supports the pin-rails at the base of the fore and main masts. This came out pretty well and I even got 15 of them to print well on the first try.
Emboldened by this success, I picked the launch's boat howitzer to try next. It was a bit tedious, and while I found lots of material and images on what these guns looked like, it seems every one was at least a little different than the others.
A test print didn't come out very well, but it did help me figure out some errors and flaws in the digital model.
Before trying to print anything in earnest, I figured to make a few 3D models, next up being the pivot guns.
I had already made the pivot guns from wood and resin, and intended on detailing them out with photo-etched hardware and fittings. Instead, I going for the entire gun, carriage, and slide as a fully detailed model, and hopefully print it in a single piece, well, print TWO of them that is.
The most basic of 3D models for this pivot gun was made years ago, so all I had to do was detail it out. I'm real happy with how the 3D model turned out, though I'm real nervous about actually printing the things.
This forum doesn't offer a way to put images into the text, or display them in any sort of order, so you'll have to figure out what pic goes where and with what on your own - sorry.
A request to 3D print something for someone left me with a vat of resin on the printer, so I decided to give printing some items for Constellation another try.
First up was the boat howitzer which came out right on the first try. That encouraged me to keep going with two of the ship's four anchors. Pushing my luck further still I went for another pivot gun. This one had some issues very similar to the last attempt at this model, and like that one, is usable with a bit of repair work. I'm going to rearrange some things in the file and give it another go before I give up.
I also printed some steering wheels for a friend's 4 foot RC schooner, and started working on a 3D model for a sampson-post mounted windlass.
[{"id":"164656151444","name":"164656151444.jpg","caption":"","url":"https:\/\/hobby.land\/media\/164656151444\/l","thumbUrl":"https:\/\/hobby.land\/media\/164656151444\/s","isImage":true,"ext":"jpg"},{"id":"164656151079","name":"164656151079.jpg","caption":"","url":"https:\/\/hobby.land\/media\/164656151079\/l","thumbUrl":"https:\/\/hobby.land\/media\/164656151079\/s","isImage":true,"ext":"jpg"},{"id":"164656150822","name":"164656150822.jpg","caption":"","url":"https:\/\/hobby.land\/media\/164656150822\/l","thumbUrl":"https:\/\/hobby.land\/media\/164656150822\/s","isImage":true,"ext":"jpg"},{"id":"164656151074","name":"164656151074.jpg","caption":"","url":"https:\/\/hobby.land\/media\/164656151074\/l","thumbUrl":"https:\/\/hobby.land\/media\/164656151074\/s","isImage":true,"ext":"jpg"},{"id":"164656151191","name":"164656151191.jpg","caption":"","url":"https:\/\/hobby.land\/media\/164656151191\/l","thumbUrl":"https:\/\/hobby.land\/media\/164656151191\/s","isImage":true,"ext":"jpg"},{"id":"164656150636","name":"164656150636.jpg","caption":"","url":"https:\/\/hobby.land\/media\/164656150636\/l","thumbUrl":"https:\/\/hobby.land\/media\/164656150636\/s","isImage":true,"ext":"jpg"},{"id":"164656151466","name":"164656151466.png","caption":"","url":"https:\/\/hobby.land\/media\/164656151466\/l","thumbUrl":"https:\/\/hobby.land\/media\/164656151466\/s","isImage":true,"ext":"png"}]
A request to 3D print something for someone left me with a vat of resin on the printer, so I decided to give printing some items for Constellation another try.
First up was the boat howitzer which came out right on the first try. That encouraged me to keep going with two of the ship's four anchors. Pushing my luck further still I went for another pivot gun. This one had some issues very similar to the last attempt at this model, and like that one, is usable with a bit of repair work. I'm going to rearrange some things in the file and give it another go before I give up.
I also printed some steering wheels for a friend's 4 foot RC schooner, and started working on a 3D model for a sampson-post mounted windlass.
I got another bottle of this resin, but this time in gray, and after rearranging the supports, printed another pivot gun. It's in the pic with part of my growing collection of pivot guns. The low poly gun barrel I originally made in 2009, really stands out, so I made a new barrel that's smoother and printed yet another pivot gun, now with a nice smooth barrel.
Then I started modeling the fitting for the launch's boat-howitzer. While at it, I decided to model the boat's rail with the fittings attached, and printed that in two parts (it wouldn't fit in the printer in one piece).
[{"id":"164738990264","name":"164738990264.png","caption":"","url":"https:\/\/hobby.land\/media\/164738990264\/l","thumbUrl":"https:\/\/hobby.land\/media\/164738990264\/s","isImage":true,"ext":"png"},{"id":"164738951511","name":"164738951511.jpg","caption":"","url":"https:\/\/hobby.land\/media\/164738951511\/l","thumbUrl":"https:\/\/hobby.land\/media\/164738951511\/s","isImage":true,"ext":"jpg"},{"id":"164738951514","name":"164738951514.jpg","caption":"","url":"https:\/\/hobby.land\/media\/164738951514\/l","thumbUrl":"https:\/\/hobby.land\/media\/164738951514\/s","isImage":true,"ext":"jpg"},{"id":"164738984475","name":"164738984475.png","caption":"","url":"https:\/\/hobby.land\/media\/164738984475\/l","thumbUrl":"https:\/\/hobby.land\/media\/164738984475\/s","isImage":true,"ext":"png"}]
I got another bottle of this resin, but this time in gray, and after rearranging the supports, printed another pivot gun. It's in the pic with part of my growing collection of pivot guns. The low poly gun barrel I originally made in 2009, really stands out, so I made a new barrel that's smoother and printed yet another pivot gun, now with a nice smooth barrel.
Then I started modeling the fitting for the launch's boat-howitzer. While at it, I decided to model the boat's rail with the fittings attached, and printed that in two parts (it wouldn't fit in the printer in one piece).
Glued down the rail with the guns mounting points and gave everything a first coat of paint - needs some touch-up.
[{"id":"164756165347","name":"164756165347.jpg","caption":"","url":"https:\/\/hobby.land\/media\/164756165347\/l","thumbUrl":"https:\/\/hobby.land\/media\/164756165347\/s","isImage":true,"ext":"jpg"},{"id":"164756165186","name":"164756165186.jpg","caption":"","url":"https:\/\/hobby.land\/media\/164756165186\/l","thumbUrl":"https:\/\/hobby.land\/media\/164756165186\/s","isImage":true,"ext":"jpg"},{"id":"164756165254","name":"164756165254.jpg","caption":"","url":"https:\/\/hobby.land\/media\/164756165254\/l","thumbUrl":"https:\/\/hobby.land\/media\/164756165254\/s","isImage":true,"ext":"jpg"},{"id":"164756165147","name":"164756165147.jpg","caption":"","url":"https:\/\/hobby.land\/media\/164756165147\/l","thumbUrl":"https:\/\/hobby.land\/media\/164756165147\/s","isImage":true,"ext":"jpg"},{"id":"164756165396","name":"164756165396.jpg","caption":"","url":"https:\/\/hobby.land\/media\/164756165396\/l","thumbUrl":"https:\/\/hobby.land\/media\/164756165396\/s","isImage":true,"ext":"jpg"},{"id":"164756165331","name":"164756165331.jpg","caption":"","url":"https:\/\/hobby.land\/media\/164756165331\/l","thumbUrl":"https:\/\/hobby.land\/media\/164756165331\/s","isImage":true,"ext":"jpg"},{"id":"164756318255","name":"164756318255.jpg","caption":"","url":"https:\/\/hobby.land\/media\/164756318255\/l","thumbUrl":"https:\/\/hobby.land\/media\/164756318255\/s","isImage":true,"ext":"jpg"}]
Took down the jury rigged rig so I can get to attaching the stuff I've been 3D printing;
Boarding steps, pin-rail stanchions, oars for the boats...
In the works are new deck circles for the pivot guns - the old ones are coming off on their own! The new ones will get made in sections like model train track and pinned down. More oars, and a new wheel is on the printer as I'm typing. Several spokes have broken off the very fragile wheel, so I a complete assembly in 3D that won't be so fragile.
[{"id":"164806656083","name":"164806656083.jpg","caption":"","url":"https:\/\/hobby.land\/media\/164806656083\/l","thumbUrl":"https:\/\/hobby.land\/media\/164806656083\/s","isImage":true,"ext":"jpg"},{"id":"164806655880","name":"164806655880.jpg","caption":"","url":"https:\/\/hobby.land\/media\/164806655880\/l","thumbUrl":"https:\/\/hobby.land\/media\/164806655880\/s","isImage":true,"ext":"jpg"},{"id":"164806655832","name":"164806655832.jpeg","caption":"","url":"https:\/\/hobby.land\/media\/164806655832\/l","thumbUrl":"https:\/\/hobby.land\/media\/164806655832\/s","isImage":true,"ext":"jpeg"},{"id":"164806656024","name":"164806656024.jpg","caption":"","url":"https:\/\/hobby.land\/media\/164806656024\/l","thumbUrl":"https:\/\/hobby.land\/media\/164806656024\/s","isImage":true,"ext":"jpg"}]
Took down the jury rigged rig so I can get to attaching the stuff I've been 3D printing;
Boarding steps, pin-rail stanchions, oars for the boats...
In the works are new deck circles for the pivot guns - the old ones are coming off on their own! The new ones will get made in sections like model train track and pinned down. More oars, and a new wheel is on the printer as I'm typing. Several spokes have broken off the very fragile wheel, so I a complete assembly in 3D that won't be so fragile.
I modeled and printed new pin rails to sit on the stanchions/pilasters shown in the last post, these with the belaying pins already in place.
I had a 3D printed wheel from Shapeways, but it was so brittle that a spoke seemed to break off just looking at it, so I printed a whole new wheel.
I replaced the clunky skylight panels with 3D printed one that are better sized and have better detail. They need to be pained, glass installed, and hinged on the skylight yet.
The only idea of what the stern of the ship looked like early on was a drawing of her in dry dock in 1859, when she returned from her first cruise. In that drawing are a couple of circles connected by thick drawn lines, and since 1999, I've had no idea what they represented. Recently, I finally found out they were Night Lifebuoys. Some Royal Navy officer named Cooke invented the things around 1818, and they apparently were very common on ships in most of the world's navies. Based on poor photos mostly, and the design of some more modern versions, I 3D modeled some fairly simple versions and printed them. The ball floats were copper, but based on photos, some of which of Constellation herself, it looks like they were painted right-over in typical Navy tradition.
I'm gonna need a pile of bullseyes in different sizes, and shroud-fairleads, or as they were apparently known, sizing-trucks, for what reason I can't figure out. I modeled and printed three sizes of these items.
I found some 3D models of American Civil War sailors, that I can use to make a crew. I printed them as is to see how they'd turn out, but I'll alter the files, or alter the figures after printing to get what I need. In all I already planned on 30-40 figures in little vignettes about the ship, these pics show 19 so far, and a cat. Stella the cat will probably sit on the capstan as she is here, it just seems like a natural place for her. I haven't decided if I'll paint her as a calico or a yellow tabby. I'll probably have a second cat, and a rat for it to be chasing, somewhere around the main hatch.
Back aft, I think I'll fix the pivot gun off center as shown, with a crew drilling it's operation. The forward gun is surrounded by a spider's web of jib sheets to tangle with the figures, but the aft crew only has to contend with the spanker sheet.
The picture of the whole model shows that even just 19 crew and a cat makes for a much livelier display.
It took a few tries and a lot of adjustments, but I manged to model and properly print articulated studded anchor chain, ie printed all in one go without the links being bonded together. Four sets, one for each anchor, are all printed and painted as of today.
[{"id":"164974997723","name":"164974997723.jpg","caption":"","url":"https:\/\/hobby.land\/media\/164974997723\/l","thumbUrl":"https:\/\/hobby.land\/media\/164974997723\/s","isImage":true,"ext":"jpg"},{"id":"164975037330","name":"164975037330.jpg","caption":"","url":"https:\/\/hobby.land\/media\/164975037330\/l","thumbUrl":"https:\/\/hobby.land\/media\/164975037330\/s","isImage":true,"ext":"jpg"},{"id":"164974997435","name":"164974997435.jpg","caption":"","url":"https:\/\/hobby.land\/media\/164974997435\/l","thumbUrl":"https:\/\/hobby.land\/media\/164974997435\/s","isImage":true,"ext":"jpg"},{"id":"164975020071","name":"164975020071.png","caption":"","url":"https:\/\/hobby.land\/media\/164975020071\/l","thumbUrl":"https:\/\/hobby.land\/media\/164975020071\/s","isImage":true,"ext":"png"},{"id":"164975012999","name":"164975012999.png","caption":"","url":"https:\/\/hobby.land\/media\/164975012999\/l","thumbUrl":"https:\/\/hobby.land\/media\/164975012999\/s","isImage":true,"ext":"png"},{"id":"164975012870","name":"164975012870.png","caption":"","url":"https:\/\/hobby.land\/media\/164975012870\/l","thumbUrl":"https:\/\/hobby.land\/media\/164975012870\/s","isImage":true,"ext":"png"},{"id":"164975037532","name":"164975037532.jpg","caption":"","url":"https:\/\/hobby.land\/media\/164975037532\/l","thumbUrl":"https:\/\/hobby.land\/media\/164975037532\/s","isImage":true,"ext":"jpg"},{"id":"164975010227","name":"164975010227.png","caption":"","url":"https:\/\/hobby.land\/media\/164975010227\/l","thumbUrl":"https:\/\/hobby.land\/media\/164975010227\/s","isImage":true,"ext":"png"},{"id":"164974997540","name":"164974997540.jpg","caption":"","url":"https:\/\/hobby.land\/media\/164974997540\/l","thumbUrl":"https:\/\/hobby.land\/media\/164974997540\/s","isImage":true,"ext":"jpg"},{"id":"164974997370","name":"164974997370.jpg","caption":"","url":"https:\/\/hobby.land\/media\/164974997370\/l","thumbUrl":"https:\/\/hobby.land\/media\/164974997370\/s","isImage":true,"ext":"jpg"},{"id":"164974997899","name":"164974997899.jpg","caption":"","url":"https:\/\/hobby.land\/media\/164974997899\/l","thumbUrl":"https:\/\/hobby.land\/media\/164974997899\/s","isImage":true,"ext":"jpg"},{"id":"164974997416","name":"164974997416.jpg","caption":"","url":"https:\/\/hobby.land\/media\/164974997416\/l","thumbUrl":"https:\/\/hobby.land\/media\/164974997416\/s","isImage":true,"ext":"jpg"},{"id":"164974997797","name":"164974997797.jpg","caption":"","url":"https:\/\/hobby.land\/media\/164974997797\/l","thumbUrl":"https:\/\/hobby.land\/media\/164974997797\/s","isImage":true,"ext":"jpg"},{"id":"164974997586","name":"164974997586.jpg","caption":"","url":"https:\/\/hobby.land\/media\/164974997586\/l","thumbUrl":"https:\/\/hobby.land\/media\/164974997586\/s","isImage":true,"ext":"jpg"},{"id":"164974997897","name":"164974997897.jpg","caption":"","url":"https:\/\/hobby.land\/media\/164974997897\/l","thumbUrl":"https:\/\/hobby.land\/media\/164974997897\/s","isImage":true,"ext":"jpg"},{"id":"164974997649","name":"164974997649.jpg","caption":"","url":"https:\/\/hobby.land\/media\/164974997649\/l","thumbUrl":"https:\/\/hobby.land\/media\/164974997649\/s","isImage":true,"ext":"jpg"}]
I modeled and printed new pin rails to sit on the stanchions/pilasters shown in the last post, these with the belaying pins already in place.
I had a 3D printed wheel from Shapeways, but it was so brittle that a spoke seemed to break off just looking at it, so I printed a whole new wheel.
I replaced the clunky skylight panels with 3D printed one that are better sized and have better detail. They need to be pained, glass installed, and hinged on the skylight yet.
The only idea of what the stern of the ship looked like early on was a drawing of her in dry dock in 1859, when she returned from her first cruise. In that drawing are a couple of circles connected by thick drawn lines, and since 1999, I've had no idea what they represented. Recently, I finally found out they were Night Lifebuoys. Some Royal Navy officer named Cooke invented the things around 1818, and they apparently were very common on ships in most of the world's navies. Based on poor photos mostly, and the design of some more modern versions, I 3D modeled some fairly simple versions and printed them. The ball floats were copper, but based on photos, some of which of Constellation herself, it looks like they were painted right-over in typical Navy tradition.
I'm gonna need a pile of bullseyes in different sizes, and shroud-fairleads, or as they were apparently known, sizing-trucks, for what reason I can't figure out. I modeled and printed three sizes of these items.
I found some 3D models of American Civil War sailors, that I can use to make a crew. I printed them as is to see how they'd turn out, but I'll alter the files, or alter the figures after printing to get what I need. In all I already planned on 30-40 figures in little vignettes about the ship, these pics show 19 so far, and a cat. Stella the cat will probably sit on the capstan as she is here, it just seems like a natural place for her. I haven't decided if I'll paint her as a calico or a yellow tabby. I'll probably have a second cat, and a rat for it to be chasing, somewhere around the main hatch.
Back aft, I think I'll fix the pivot gun off center as shown, with a crew drilling it's operation. The forward gun is surrounded by a spider's web of jib sheets to tangle with the figures, but the aft crew only has to contend with the spanker sheet.
The picture of the whole model shows that even just 19 crew and a cat makes for a much livelier display.
It took a few tries and a lot of adjustments, but I manged to model and properly print articulated studded anchor chain, ie printed all in one go without the links being bonded together. Four sets, one for each anchor, are all printed and painted as of today.
I hung an anchor on the cathead just to see how it looked there, and get some idea what it would require to get the thing lashed up as it is in the painting - which reminds me, I have to make a cat head for the cathead.
I tweaked the model for the oars and tried printing 45 all at once. I got what was either a Borg cube or some sort of electrical heat-sink thing. I've managed to dig out 27 or them with only 4 total losses so far, but I don't hold much hope for the rest.
I did up the bob-stays with the 3D printed bulls-eyes and temporarily lashed them up - I have to walk some line for the permanent lashings.
Years ago now, the bulwarks were covered with several layers of balsa sheet, rounded over and painted black to look a bit like tarpaulins over the hammocks until I could figure out how I was going to make exposed hammocks as appears in nearly all the paintings and photos of the ship. 3D printing settled that for me, but just printing them outright would use too much expensive resin, so I needed to make them hollow. 200 hammocks will be visible when it's all done, and I have just under half of them printed in groups of 9 hammocks. I primed them in gray, then painted a first coat of "canvas" which is my custom mix of flat white with about 1/8 of it flat tan.
I sawed of the wheel-stand, of the new 3D printed wheel and used the wood stand from the old 3D printed wheel, which means the wheel can properly spin now. So I'm going back to plan A and connecting the wheel to the rudder servo so it's move when the rudder does. The skylight and wheel also got painted, though the skylight bars need some touch-up (that flash really brings out every little flaw!)
I finally finished the 3D model of the gun rings for the pivot guns. I modeled in holes so I could pin them down as well as CA them to the deck. I mounted them to print all together at once, but left more space between things so as not to repeat the above oar-block problem-turns out I needed to leave more space still. The holes I modeled were too small and printed as dimples, so I wound up drilling them anyway. They got a base coat of black, but will get a "gunmetal" or "steel" paint job at some point.
Then, while printing 2 more hammock trays, I broke the printer, again. Last time the LCD screen went bad. This time the resin vat stuck to the LCD and tore off the ribbon cable when I was trying to remove the vat. Before this happened, I had ordered an upgrade screen kit that's supposed to speed up printing times by as much as 2x, but it hasn't arrived yet.
If any of you are trying this at home, put a sheet of film over the LDC so if the vat sticks, it pulls the film, and not the screen.
[{"id":"165084188624","name":"165084188624.jpg","caption":"","url":"https:\/\/hobby.land\/media\/165084188624\/l","thumbUrl":"https:\/\/hobby.land\/media\/165084188624\/s","isImage":true,"ext":"jpg"},{"id":"165084188834","name":"165084188834.jpg","caption":"","url":"https:\/\/hobby.land\/media\/165084188834\/l","thumbUrl":"https:\/\/hobby.land\/media\/165084188834\/s","isImage":true,"ext":"jpg"},{"id":"165084188547","name":"165084188547.jpg","caption":"","url":"https:\/\/hobby.land\/media\/165084188547\/l","thumbUrl":"https:\/\/hobby.land\/media\/165084188547\/s","isImage":true,"ext":"jpg"},{"id":"165084188759","name":"165084188759.jpg","caption":"","url":"https:\/\/hobby.land\/media\/165084188759\/l","thumbUrl":"https:\/\/hobby.land\/media\/165084188759\/s","isImage":true,"ext":"jpg"},{"id":"165084188599","name":"165084188599.jpg","caption":"","url":"https:\/\/hobby.land\/media\/165084188599\/l","thumbUrl":"https:\/\/hobby.land\/media\/165084188599\/s","isImage":true,"ext":"jpg"},{"id":"165084259096","name":"165084259096.png","caption":"","url":"https:\/\/hobby.land\/media\/165084259096\/l","thumbUrl":"https:\/\/hobby.land\/media\/165084259096\/s","isImage":true,"ext":"png"},{"id":"165084188686","name":"165084188686.jpg","caption":"","url":"https:\/\/hobby.land\/media\/165084188686\/l","thumbUrl":"https:\/\/hobby.land\/media\/165084188686\/s","isImage":true,"ext":"jpg"},{"id":"165084188715","name":"165084188715.jpg","caption":"","url":"https:\/\/hobby.land\/media\/165084188715\/l","thumbUrl":"https:\/\/hobby.land\/media\/165084188715\/s","isImage":true,"ext":"jpg"},{"id":"165084189144","name":"165084189144.jpg","caption":"","url":"https:\/\/hobby.land\/media\/165084189144\/l","thumbUrl":"https:\/\/hobby.land\/media\/165084189144\/s","isImage":true,"ext":"jpg"},{"id":"165084188835","name":"165084188835.jpg","caption":"","url":"https:\/\/hobby.land\/media\/165084188835\/l","thumbUrl":"https:\/\/hobby.land\/media\/165084188835\/s","isImage":true,"ext":"jpg"},{"id":"165084188899","name":"165084188899.jpg","caption":"","url":"https:\/\/hobby.land\/media\/165084188899\/l","thumbUrl":"https:\/\/hobby.land\/media\/165084188899\/s","isImage":true,"ext":"jpg"},{"id":"165084188699","name":"165084188699.jpg","caption":"","url":"https:\/\/hobby.land\/media\/165084188699\/l","thumbUrl":"https:\/\/hobby.land\/media\/165084188699\/s","isImage":true,"ext":"jpg"},{"id":"165084188957","name":"165084188957.jpg","caption":"","url":"https:\/\/hobby.land\/media\/165084188957\/l","thumbUrl":"https:\/\/hobby.land\/media\/165084188957\/s","isImage":true,"ext":"jpg"},{"id":"165084188766","name":"165084188766.jpg","caption":"","url":"https:\/\/hobby.land\/media\/165084188766\/l","thumbUrl":"https:\/\/hobby.land\/media\/165084188766\/s","isImage":true,"ext":"jpg"},{"id":"165084188828","name":"165084188828.jpg","caption":"","url":"https:\/\/hobby.land\/media\/165084188828\/l","thumbUrl":"https:\/\/hobby.land\/media\/165084188828\/s","isImage":true,"ext":"jpg"}]
I hung an anchor on the cathead just to see how it looked there, and get some idea what it would require to get the thing lashed up as it is in the painting - which reminds me, I have to make a cat head for the cathead.
I tweaked the model for the oars and tried printing 45 all at once. I got what was either a Borg cube or some sort of electrical heat-sink thing. I've managed to dig out 27 or them with only 4 total losses so far, but I don't hold much hope for the rest.
I did up the bob-stays with the 3D printed bulls-eyes and temporarily lashed them up - I have to walk some line for the permanent lashings.
Years ago now, the bulwarks were covered with several layers of balsa sheet, rounded over and painted black to look a bit like tarpaulins over the hammocks until I could figure out how I was going to make exposed hammocks as appears in nearly all the paintings and photos of the ship. 3D printing settled that for me, but just printing them outright would use too much expensive resin, so I needed to make them hollow. 200 hammocks will be visible when it's all done, and I have just under half of them printed in groups of 9 hammocks. I primed them in gray, then painted a first coat of "canvas" which is my custom mix of flat white with about 1/8 of it flat tan.
I sawed of the wheel-stand, of the new 3D printed wheel and used the wood stand from the old 3D printed wheel, which means the wheel can properly spin now. So I'm going back to plan A and connecting the wheel to the rudder servo so it's move when the rudder does. The skylight and wheel also got painted, though the skylight bars need some touch-up (that flash really brings out every little flaw!)
I finally finished the 3D model of the gun rings for the pivot guns. I modeled in holes so I could pin them down as well as CA them to the deck. I mounted them to print all together at once, but left more space between things so as not to repeat the above oar-block problem-turns out I needed to leave more space still. The holes I modeled were too small and printed as dimples, so I wound up drilling them anyway. They got a base coat of black, but will get a "gunmetal" or "steel" paint job at some point.
Then, while printing 2 more hammock trays, I broke the printer, again. Last time the LCD screen went bad. This time the resin vat stuck to the LCD and tore off the ribbon cable when I was trying to remove the vat. Before this happened, I had ordered an upgrade screen kit that's supposed to speed up printing times by as much as 2x, but it hasn't arrived yet.
If any of you are trying this at home, put a sheet of film over the LDC so if the vat sticks, it pulls the film, and not the screen.
Looking at the diagrams from the manual for operating the pivot guns, I felt my gun circles needed a bit more to them. I added circles for the center skid of the chassis to the plan, printed them, primed them, painted them with Testors' "Steel," and CAed them to the deck.
The ones on the bow overlap the edges of the access hatch, and had to be trimmed and the overhanging parts glued to the fixed part of the deck. I drilled holes for pins of some sort, to back up the CA, though I haven't decided what to use. I'm thinking Delrin rod, but I'm have to by some first.
The last sections of hammocks were printed today. Before they get installed I have some work to do on the bulwarks; hawse holes, that sort of thing. I'm planning on using slow-setting epoxy mixed with fine saw-dust to attach them.
In the last two pics, the port-side hammocks are sitting in place, I haven't removed the balsa from the starboard side yet.
[{"id":"165206451156","name":"165206451156.jpg","caption":"","url":"https:\/\/hobby.land\/media\/165206451156\/l","thumbUrl":"https:\/\/hobby.land\/media\/165206451156\/s","isImage":true,"ext":"jpg"},{"id":"165206455372","name":"165206455372.jpg","caption":"","url":"https:\/\/hobby.land\/media\/165206455372\/l","thumbUrl":"https:\/\/hobby.land\/media\/165206455372\/s","isImage":true,"ext":"jpg"},{"id":"165206455276","name":"165206455276.jpg","caption":"","url":"https:\/\/hobby.land\/media\/165206455276\/l","thumbUrl":"https:\/\/hobby.land\/media\/165206455276\/s","isImage":true,"ext":"jpg"},{"id":"165206455045","name":"165206455045.jpg","caption":"","url":"https:\/\/hobby.land\/media\/165206455045\/l","thumbUrl":"https:\/\/hobby.land\/media\/165206455045\/s","isImage":true,"ext":"jpg"},{"id":"165206455226","name":"165206455226.jpg","caption":"","url":"https:\/\/hobby.land\/media\/165206455226\/l","thumbUrl":"https:\/\/hobby.land\/media\/165206455226\/s","isImage":true,"ext":"jpg"},{"id":"165206455177","name":"165206455177.jpg","caption":"","url":"https:\/\/hobby.land\/media\/165206455177\/l","thumbUrl":"https:\/\/hobby.land\/media\/165206455177\/s","isImage":true,"ext":"jpg"},{"id":"165206455177","name":"165206455177.jpg","caption":"","url":"https:\/\/hobby.land\/media\/165206455177\/l","thumbUrl":"https:\/\/hobby.land\/media\/165206455177\/s","isImage":true,"ext":"jpg"},{"id":"165206455333","name":"165206455333.jpg","caption":"","url":"https:\/\/hobby.land\/media\/165206455333\/l","thumbUrl":"https:\/\/hobby.land\/media\/165206455333\/s","isImage":true,"ext":"jpg"},{"id":"165206493321","name":"165206493321.jpg","caption":"","url":"https:\/\/hobby.land\/media\/165206493321\/l","thumbUrl":"https:\/\/hobby.land\/media\/165206493321\/s","isImage":true,"ext":"jpg"}]
Looking at the diagrams from the manual for operating the pivot guns, I felt my gun circles needed a bit more to them. I added circles for the center skid of the chassis to the plan, printed them, primed them, painted them with Testors' "Steel," and CAed them to the deck.
The ones on the bow overlap the edges of the access hatch, and had to be trimmed and the overhanging parts glued to the fixed part of the deck. I drilled holes for pins of some sort, to back up the CA, though I haven't decided what to use. I'm thinking Delrin rod, but I'm have to by some first.
The last sections of hammocks were printed today. Before they get installed I have some work to do on the bulwarks; hawse holes, that sort of thing. I'm planning on using slow-setting epoxy mixed with fine saw-dust to attach them.
In the last two pics, the port-side hammocks are sitting in place, I haven't removed the balsa from the starboard side yet.